 PromptDon
AI की मदद से अपनी पसंद का एक virtual influencer बनाना अब पहले से आसान हो गया है। आप अपने character का चेहरा, बाल, कपड़े, personality और content style खुद तय कर सकते हैं। फिर उसी character की अलग-अलग तस्वीरें बनाकर Instagram posts, Reels और दूसरे social media platforms के लिए इस्तेमाल कर सकते हैं।
इस गाइड में मैं आपको शुरू से समझाऊंगा कि अपना AI Influencer कैसे बनाना है, उसके चेहरे को अलग-अलग images में एक जैसा रखने की कोशिश कैसे करनी है और उसके लिए ऐसे prompts कैसे लिखने हैं जिन्हें आप अपनी जरूरत के अनुसार बदल सकें।
इस लेख में दिए गए सभी prompts editable हैं। जहां भी आपको square brackets [] दिखाई दें, वहां अपनी पसंद की जानकारी लिखें। आपको किसी दूसरे व्यक्ति के character या settings को ज्यों का त्यों इस्तेमाल करने की जरूरत नहीं है।
इस गाइड में आप क्या सीखेंगे?
- AI Influencer और AI Avatar क्या होते हैं।
- अपना character बनाने से पहले किन बातों को तय करना चाहिए।
- AI Influencer बनाने के लिए कौन से tools इस्तेमाल कर सकते हैं।
- अपना पहला portrait बनाने के लिए master prompt कैसे लिखें।
- अलग-अलग images में character की पहचान कैसे बनाए रखें।
- Fashion, beauty, lifestyle और दूसरे niches के लिए images कैसे बनाएं।
- AI Influencer की तस्वीरों से videos कैसे तैयार करें।
- Instagram profile और content की योजना कैसे बनाएं।
- AI Influencer बनाने में होने वाली आम गलतियों से कैसे बचें।
1. AI Influencer क्या है?
AI Influencer एक virtual character होता है जिसकी तस्वीरें, videos या दूसरी digital सामग्री Artificial Intelligence यानी AI की मदद से बनाई जाती है।
उदाहरण के लिए, आप एक काल्पनिक महिला character बना सकते हैं जिसकी उम्र 22 साल हो, बाल लंबे और dark brown हों, आंखें brown हों और उसे fashion तथा beauty में दिलचस्पी हो। आप उसका नाम, कपड़े, personality और visual style भी तय कर सकते हैं।
इसके बाद आप उसी character को अलग-अलग outfits, locations और poses में दिखा सकते हैं। इस तरह एक ही fictional identity के साथ Instagram posts, fashion photos, beauty tutorials और lifestyle content तैयार किया जा सकता है।
AI Avatar भी एक digital character होता है, लेकिन हर avatar influencer नहीं होता। जब किसी character को एक निश्चित personality, content niche और social media identity के साथ पेश किया जाता है, तो उसे virtual influencer कहा जा सकता है।
2. AI Influencer बनाने से पहले क्या तय करें?
Image generation शुरू करने से पहले अपने character की एक छोटी profile तैयार कर लें। इससे आपको बार-बार नए सिरे से उसके चेहरे और personality के बारे में सोचने की जरूरत नहीं पड़ेगी।
Sample AI Influencer Profile
| Character Detail | Example Information |
|---|---|
| Character Name | Aanya |
| Age | 22 years |
| Location | Delhi, India |
| Niche | Fashion and Beauty |
| Personality | Friendly, confident and playful |
यह केवल समझाने के लिए एक काल्पनिक उदाहरण है। आप अपनी पसंद के अनुसार नाम, उम्र, appearance और niche चुन सकते हैं।
अपने character के लिए इन सात बातों को तय करें।
- नाम और उम्र: Character का नाम और उसकी वयस्क उम्र तय करें।
- देश और शहर: तय करें कि character किस जगह से जुड़ा दिखाई देगा।
- चेहरा: Face shape, आंखों का रंग, skin tone और signature feature चुनें।
- बाल: Hair color, length और texture तय करें।
- कपड़े: Casual, traditional, western, streetwear या कोई दूसरा style चुनें।
- Personality: Friendly, confident, funny, elegant या अपनी पसंद का अंदाज चुनें।
- Content niche: Fashion, beauty, travel, lifestyle, fitness, technology या कोई दूसरा विषय चुनें।
इन बातों को पहले तय करने का फायदा यह है कि आपका character ज्यादा स्पष्ट होगा और आगे के prompts लिखना आसान हो जाएगा।
3. AI Influencer बनाने के लिए कौन से tools इस्तेमाल करें?
AI Influencer बनाने के लिए अलग-अलग tools की जरूरत आपके काम पर निर्भर करेगी। कुछ tools तस्वीरें बनाने में मदद करते हैं, जबकि दूसरे reference images या video animation के लिए उपयोगी होते हैं।
Leonardo AI
Text prompts से portraits और fashion images बनाने के लिए इस्तेमाल कर सकते हैं। इसमें reference images की मदद से character का look बनाए रखने के विकल्प उपलब्ध हैं। Official website
Midjourney
Realistic और creative fashion portraits बनाने का विकल्प। Reference images के साथ काम करने की इसकी सुविधाएं version के अनुसार अलग होती हैं। Official website
इनके अलावा आप अपनी पसंद का कोई दूसरा image generation या image-to-video tool भी चुन सकते हैं। शुरू करने से पहले उसके free limits, subscription और commercial usage rights जांच लें।
मेरी सलाह है कि पहले एक ही image tool से शुरुआत करें। जब आपको अपने character का अच्छा portrait मिल जाए, तब दूसरी सुविधाओं पर काम करें।
4. अपना AI Influencer बनाने का पहला master prompt
अब असली काम शुरू करते हैं। नीचे दिया गया prompt एक ऐसा template है जिसे आप अपनी पसंद के अनुसार edit कर सकते हैं।
इसमें किसी एक fixed नाम, चेहरे या outfit को अनिवार्य नहीं रखा गया है। हर square bracket [] में आप अपनी जानकारी भर सकते हैं।
उदाहरण के लिए, अगर आप एक Indian fashion influencer बनाना चाहते हैं, तो nationality में Indian, hair color में Dark Brown और niche में Fashion and Beauty लिख सकते हैं। अगर आपको anime character बनाना है, तो visual style बदल सकते हैं।
Copy and paste prompt

Create an ultra-photorealistic portrait of an original fictional adult AI influencer.

CHARACTER DETAILS

Name: [Influencer Name]

Age: [Age, 18 or older]

Gender: [Gender]

Nationality: [Nationality]

City and Country: [City and Country]

Content Niche: [Fashion / Beauty / Lifestyle / Travel / Fitness / Technology / Other]

FACIAL FEATURES

Face Shape: [Oval / Round / Heart-shaped / Square / Other]

Skin Tone: [Fair / Light Medium / Medium / Warm Brown / Deep Brown / Other]

Eye Color: [Brown / Hazel / Blue / Green / Other]

Eye Shape: [Almond-shaped / Round / Hooded / Other]

Hair Color: [Black / Dark Brown / Light Brown / Blonde / Other]

Hair Length: [Short / Shoulder-length / Long]

Hair Texture: [Straight / Wavy / Curly / Other]

Signature Feature: [Beauty Mark / Dimples / Freckles / Distinctive Eyebrows / Other]

Overall Appearance: [Describe the face and appearance you want]

STYLE AND PERSONALITY

Clothing Style: [Casual / Traditional / Western / Streetwear / Luxury / Other]

Makeup Style: [Natural / Minimal / Glamorous / Editorial / Other]

Personality: [Friendly / Confident / Playful / Elegant / Funny / Other]

Color Palette: [Preferred Colors]

Visual Style: [Photorealistic / Cinematic / Editorial / 2D Anime / Other]

PHOTOGRAPHY

Create a [Close-up / Head-and-Shoulders / Half-Body / Full-Body] portrait.

Background: [Studio / Cafe / Home / Street / Garden / Other]

Lighting: [Soft Daylight / Golden Hour / Studio Lighting / Other]

Camera Angle: [Front View / Three-Quarter View / Side Profile / Other]

Aspect Ratio: [4:5 / 9:16 / 1:1 / 16:9]

Use realistic skin texture, detailed eyes, natural hair strands, believable shadows, accurate anatomy and natural facial proportions.

ORIGINAL CHARACTER REQUIREMENTS

Create a distinctive fictional character. Do not intentionally imitate a real person, celebrity or existing influencer.

Establish the generated portrait as the primary visual reference for future images.

For future generations, preserve the character's recognizable face shape, eye color, skin tone, hairstyle and signature features. Change only the requested outfit, pose, expression, background and lighting.

When supported by the chosen image generation tool, use the primary portrait as a character reference. Do not rely on the text prompt alone to reproduce an identical face.

FINAL QUALITY CHECK

Avoid distorted eyes, unnatural skin smoothing, malformed hands, extra fingers, inconsistent facial features, unwanted text and watermarks.

The final image should match the chosen character profile, visual style and intended use.
इस prompt को edit कैसे करें?
मान लीजिए आपको एक 25 साल की fictional Indian travel influencer बनानी है।
[Influencer Name]की जगह अपना चुना हुआ नाम लिखें।[Age, 18 or older]में 25 लिखें।[Content Niche]में Travel लिखें।[Hair Texture]में Curly लिखें, अगर आपको घुंघराले बाल चाहिए।[Background]में Mountain Resort या Beach लिखें।[Aspect Ratio]में 9:16 लिखें, अगर आपको vertical image चाहिए।
आपको हर विकल्प में से केवल एक ही चीज चुनने की जरूरत नहीं है। जहां उपयोगी हो, आप एक से ज्यादा विवरण भी जोड़ सकते हैं।
5. पहला portrait बनाने का सही तरीका
Master prompt तैयार करने के बाद ये steps अपनाएं।
- अपना चुना हुआ image generation tool खोलें।
- Image generation वाले विकल्प में master prompt paste करें।
- यदि tool में aspect ratio चुनने का विकल्प है, तो अपनी जरूरत के अनुसार चुनें।
- कुछ images generate करें और उनमें से सबसे अच्छा चेहरा चुनें।
- चुनी हुई image को save करके मुख्य reference image के रूप में रखें।
पहली image बनाते समय background बहुत जटिल न रखें। साधारण studio background और साफ portrait से चेहरे को जांचना आसान होता है।
अगर पहली generation में चेहरा ठीक नहीं आया, तो पूरा prompt बदलने के बजाय पहले face shape, hair या lighting जैसी एक या दो चीजें बदलकर देखें।
AI से Kids Coloring Book कैसे बनाएं और Amazon KDP पर Publish करें?
AI से Cinematic Short Film कैसे बनाएं? Beginner के लिए Step by Step tutorial
6. Character consistency क्या है और इसे कैसे बनाए रखें?
Character consistency का मतलब है कि अलग-अलग तस्वीरों में आपका character पहचानने में एक जैसा लगे।
उदाहरण के लिए, पहली image में character के लंबे काले बाल हैं और brown eyes हैं। अगली image में कपड़े बदल सकते हैं, लेकिन बाल, आंखों का रंग और चेहरे की मुख्य बनावट समान रहनी चाहिए।
इसके लिए सबसे उपयोगी तरीका है कि आप हर नई image में अपनी मुख्य portrait को reference के रूप में इस्तेमाल करें।
Leonardo AI में Image Guidance और Character Reference जैसी सुविधाएं उपलब्ध हैं। Midjourney में version के अनुसार Omni Reference या Edit Model जैसे विकल्प मिलते हैं। इन सुविधाओं का तरीका और उपलब्धता बदल सकती है।
AI Influencer की Detailed Character Reference Sheet कैसे बनाएं?
अगर आप चाहते हैं कि आपके AI Influencer का चेहरा अलग-अलग images में पहचानने योग्य बना रहे, तो उसकी एक detailed Character Reference Sheet तैयार करें।
इस sheet में केवल सामने से लिया गया portrait नहीं, बल्कि चेहरे के अलग-अलग angles, facial expressions, आंखों और होंठों के close-ups, hairstyle और signature accessories की details भी होनी चाहिए।
उदाहरण के लिए, अगर आपके character के लंबे wavy बाल, brown eyes, एक beauty mark और gold hoop earrings हैं, तो इन सभी details को reference sheet में स्पष्ट रूप से दिखाएं। इससे आगे नई images बनाते समय character की पहचान बनाए रखने में मदद मिलेगी।
Copy and Paste Character Reference Sheet Prompt
नीचे दिया गया prompt अपनी पसंद के अनुसार edit कर सकते हैं। Square brackets [] के अंदर लिखी जानकारी को अपने character की details से बदलें।
Prompt

Create a professional, ultra-detailed character reference sheet for an original fictional adult character.

CHARACTER INFORMATION

Character Name: [Character Name]

Age: [Age, 18 or older]

Gender: [Gender]

Nationality: [Nationality]

Visual Style: [Photorealistic / Cinematic / Editorial / 2D Anime / Other]

FACIAL IDENTITY

Face Shape: [Oval / Round / Heart-shaped / Square / Other]

Skin Tone: [Fair / Light Medium / Medium / Warm Brown / Deep Brown / Other]

Eye Color: [Brown / Hazel / Blue / Green / Other]

Eye Shape: [Almond-shaped / Round / Hooded / Other]

Eyebrow Shape: [Natural Straight / Soft Arch / Defined Arch / Other]

Nose Shape: [Straight / Rounded / Small / Other]

Lip Shape: [Naturally Full / Softly Defined / Other]

Cheek Structure: [Soft Cheeks / Defined Cheekbones / Other]

Signature Features: [Beauty Mark / Dimples / Freckles / Other]

HAIR DETAILS

Hair Color: [Hair Color]

Hair Length: [Short / Shoulder-length / Long]

Hair Texture: [Straight / Wavy / Curly]

Hair Volume: [Natural / Voluminous / Other]

Hair Parting: [Center Part / Slightly Off-center / Side Part]

Hairline: [Natural Hairline / Other Details]

ACCESSORIES AND SIGNATURE LOOK

Earrings: [Small Gold Hoops / Stud Earrings / None / Other]

Necklace: [Thin Gold Chain / Pendant Necklace / None / Other]

Other Accessories: [Glasses / Hair Clip / Bracelet / Other]

Signature Clothing: [Describe the Character's Usual Outfit]

REFERENCE SHEET LAYOUT

Create clearly separated panels showing the same character in the following views:

Front-facing head-and-shoulders portrait with a neutral expression.

Three-quarter face view.

Left-side profile.

Right-side profile.

Full-body front view in [Simple Neutral Outfit].

Gentle natural smile.

Closed-eye smile.

Playful pout.

Confident expression.

Close-up of the eyes, eyebrows and eyelashes.

Close-up of the lips and natural skin texture.

Close-up of [Signature Features].

Close-up of the hairstyle, hairline and hair texture.

Close-up of [Signature Accessories].

IDENTITY CONSISTENCY RULES

Every panel must represent the same fictional character.

Preserve the same facial structure, eye shape, eye color, eyebrows, nose, lips, skin tone, hairstyle, hairline and signature features across all views.

Do not redesign the face between panels. Avoid changing the character's age, facial proportions or recognizable appearance.

Keep accessories consistent wherever they are intended to be part of the character's signature look.

BACKGROUND AND LIGHTING

Background: [Plain White / Light Gray / Neutral Studio Background]

Lighting: [Soft Studio Lighting / Soft Daylight / Other]

Use consistent, balanced lighting so facial details remain easy to compare across panels.

QUALITY REQUIREMENTS

Photorealistic skin texture, detailed hair strands, realistic eyes, natural facial proportions, accurate anatomy and clear close-up details.

Keep panels visually organized, evenly spaced and easy to compare. Avoid unnecessary decoration, overlapping views, distorted facial features, extra fingers, text labels and watermarks.

The character must be original and fictional, without intentionally resembling a real person or celebrity.

Aspect Ratio: [4:5 / 3:4 / 9:16 / Other Supported Ratio]
इस Prompt को अपनी जरूरत के अनुसार कैसे Edit करें?
आपको पूरा prompt दोबारा लिखने की जरूरत नहीं है। बस square brackets के अंदर दी गई जानकारी बदलें।
उदाहरण के लिए, अगर आप एक fictional Indian fashion influencer बनाना चाहते हैं, तो ये details भर सकते हैं:
Character Name: [Aanya]
Age: [22]
Nationality: [Indian]
Face Shape: [Soft Oval]
Skin Tone: [Warm Fair-medium]
Eye Color: [Brown]
Hair Color: [Dark Brown]
Hair Length: [Long]
Hair Texture: [Wavy]
Signature Features: [Small Beauty Mark on the Left Cheek]
Earrings: [Small Gold Hoop Earrings]
Necklace: [Thin Gold Chain with Round Pendant]
Visual Style: [Photorealistic]
इन विवरणों को अपने character के अनुसार बदलें। अगर आपको anime character बनाना है, तो Visual Style में 2D Anime लिखें। अगर character के बाल छोटे हैं, तो Hair Length में Short चुनें।
ध्यान रखें कि यह केवल एक उदाहरण है। आप अपनी पसंद का नाम, appearance, hairstyle और accessories चुन सकते हैं।
Character Reference Sheet बनाने के Steps
Step 1. अपना पसंदीदा AI image generation tool खोलें।
Step 2. ऊपर दिया गया prompt copy करें और square brackets में अपनी character details भरें।
Step 3. पूरा prompt image generation field में paste करें। अगर tool में aspect ratio का विकल्प है, तो अपनी जरूरत के अनुसार चुनें।
Step 4. Character Reference Sheet generate करें और जांचें कि अलग-अलग panels में चेहरा एक जैसा दिखाई दे रहा है या नहीं।
Step 5. अगर एक ही image में सभी views ठीक नहीं बनते, तो prompt को छोटे हिस्सों में बांटें। पहले front portrait बनाएं, फिर अलग-अलग prompts से side profile, expressions और close-up details तैयार करें।
Step 6. सबसे अच्छे front portrait को अपनी Primary Character Reference Image के रूप में save करें। जरूरत पड़ने पर side profile और expression images भी अलग से सुरक्षित रखें।
नई Images बनाते समय Character Reference Sheet का इस्तेमाल कैसे करें?
जब आप अपने character को किसी नई location या outfit में दिखाना चाहते हैं, तो उसकी Primary Character Reference Image को नए prompt के साथ upload करें। अगर आपका tool character reference या image guidance की सुविधा देता है, तो उसका इस्तेमाल करें।
उदाहरण के लिए, नई image के लिए यह prompt इस्तेमाल कर सकते हैं:
Use the supplied reference image of [Character Name]. Preserve the same recognizable facial identity, face shape, eye color, skin tone, hairstyle and signature features.
Create a photorealistic fashion photograph of the same character wearing [New Outfit] at [Location].
Pose: [Describe Pose]
Expression: [Describe Expression]
Lighting: [Lighting Style]
Maintain consistent facial features, natural anatomy, realistic clothing textures and believable hands. Change only the requested outfit, pose, expression, background and lighting.
Aspect Ratio: [4:5 / 9:16]
इस prompt में केवल outfit, location, pose और lighting बदलें। चेहरे की पहचान वाले विवरणों को समान रखें।
ध्यान दें: Character Reference Sheet कोई ऐसा नियम नहीं है जो हर generation में बिल्कुल एक जैसा चेहरा सुनिश्चित कर दे। AI कई बार facial details बदल सकता है। इसलिए reference image का इस्तेमाल करें और हर नई image को ध्यान से जांचें।
Character consistency prompt
इस छोटे template को अपनी नई image के prompt के साथ जोड़ें।

Use the supplied reference image of [Character Name], the same fictional adult character.

Preserve the character's recognizable facial structure, [Eye Color], [Skin Tone], [Hair Color], [Hair Length], [Hair Texture] and [Signature Feature].

Create a new image showing the same character wearing [New Outfit], in [New Location], with [New Pose] and [New Expression].

Change only the requested clothing, pose, expression, background and lighting. Keep the character's identity consistent with the supplied reference image.

Visual Style: [Visual Style]

Lighting: [Lighting Style]

Aspect Ratio: [Aspect Ratio]

Maintain natural anatomy, realistic skin texture, believable hands and consistent facial features. Avoid unintended changes to the character's identity.
हर नई image में मुख्य reference image इस्तेमाल करें, अगर आपका tool यह सुविधा देता है। केवल prompt में same face लिख देने से बिल्कुल एक जैसा चेहरा मिलने की गारंटी नहीं होती।
7. अलग-अलग outfits और locations में images कैसे बनाएं?
जब आपके पास character का मुख्य portrait हो जाए, तो अब उसे अलग-अलग outfits और backgrounds में दिखा सकते हैं।
आपको हर बार पूरा master prompt दोबारा लिखने की जरूरत नहीं है। मुख्य character reference के साथ एक छोटा scene prompt इस्तेमाल कर सकते हैं।
Example 1. Casual fashion look

Use the supplied reference image of [Character Name]. Preserve the same recognizable face, hairstyle, skin tone and signature features.

Create a photorealistic full-body fashion photograph. The character is wearing [Top or Shirt], [Trousers or Jeans] and [Footwear]. The location is [Cafe / Shopping Street / Home / Other].

Pose: [Natural Standing Pose / Walking / Sitting / Other]

Expression: [Gentle Smile / Confident Look / Playful Expression]

Lighting: [Soft Daylight / Golden Hour / Studio Lighting]

Maintain realistic fabric textures, natural anatomy, accurate hands and consistent character identity.

Aspect Ratio: [4:5 / 9:16]
Example 2. Traditional Indian fashion

Use the supplied reference image of [Character Name] and preserve the same facial identity.

Create a photorealistic Indian fashion portrait featuring [Traditional Outfit], [Dupatta Style] and [Jewelry Style].

Location: [Indian Courtyard / Home / Festive Venue / Other]

Pose: [Standing / Walking / Seated / Other]

Expression: [Natural Smile / Elegant Expression / Other]

Lighting: [Soft Morning Light / Warm Evening Light / Other]

Show realistic fabric folds, embroidery details, natural skin texture and believable body proportions. Keep the character's face, hairstyle and signature features consistent with the reference image.

Aspect Ratio: [4:5 / 9:16]
Example 3. Beauty और makeup content
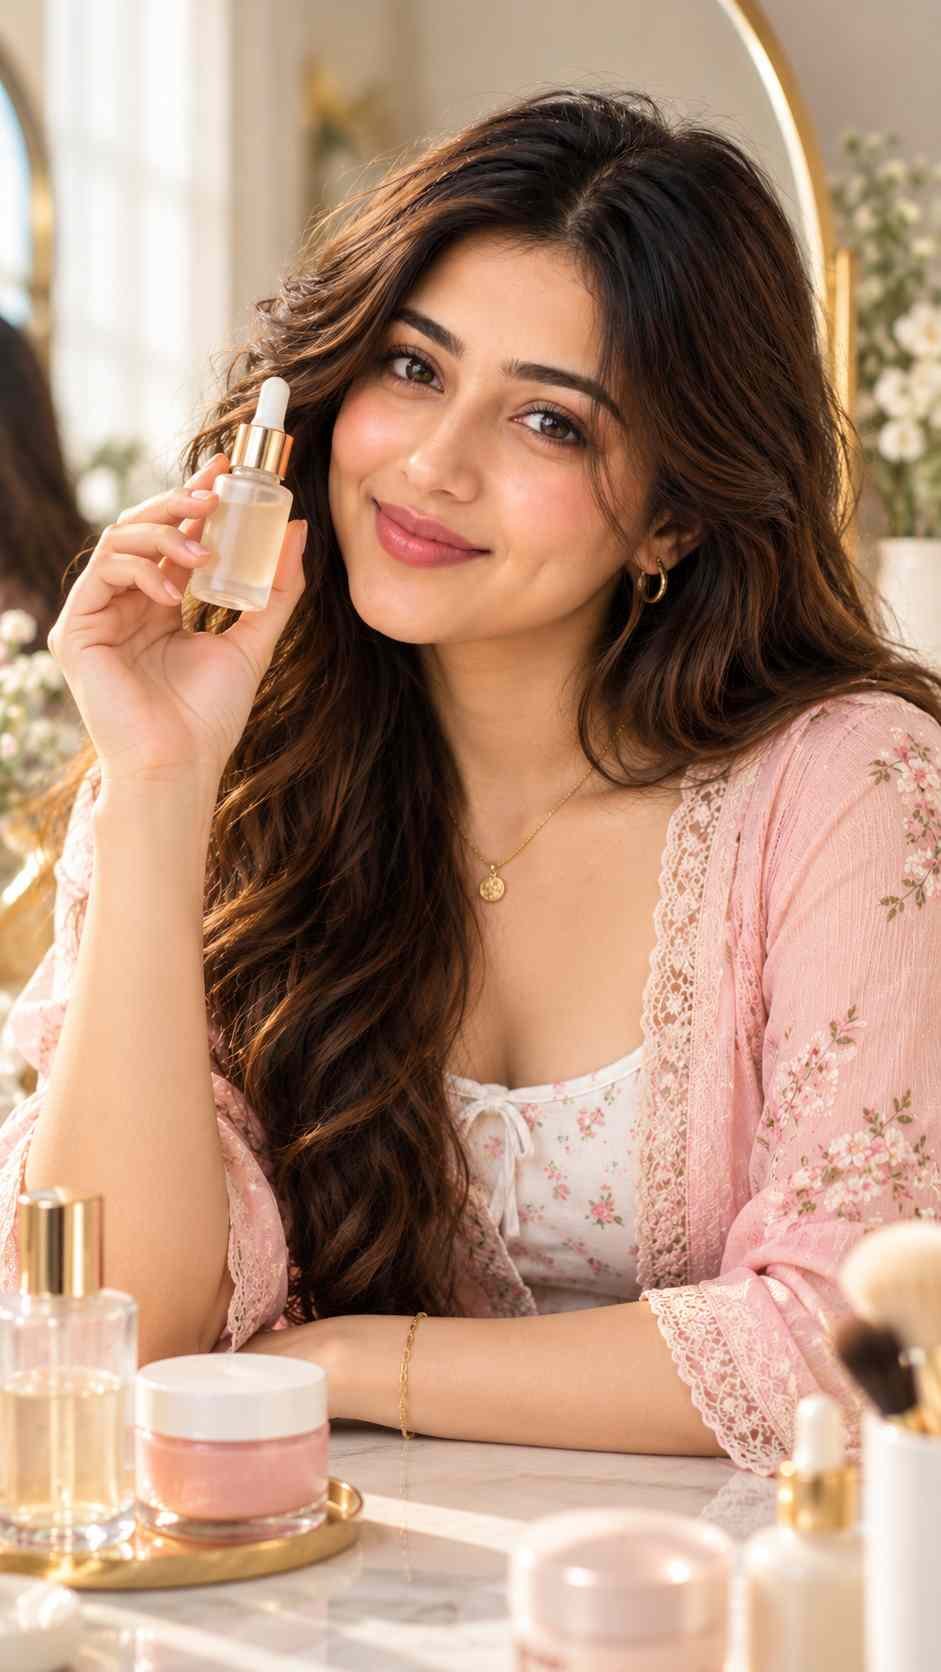
Use the supplied reference image of [Character Name]. Keep the same face, hair, skin tone and recognizable features.

Create a realistic beauty editorial photograph featuring [Makeup Look] and [Beauty Product or Skincare Item].

Location: [Vanity Table / Minimal Studio / Bathroom / Other]

Pose: [Holding Product / Looking at Mirror / Applying Makeup / Other]

Lighting: [Soft Window Light / Studio Beauty Lighting / Other]

Show realistic skin texture, natural makeup details, believable fingers and accurate product proportions. Do not invent brand logos or product claims. Preserve the character's identity.

Aspect Ratio: [4:5 / 9:16]
Example 4. Travel और lifestyle content

Use the supplied reference image of [Character Name] and maintain the same recognizable facial identity.

Create a photorealistic travel and lifestyle photograph. The character is wearing [Travel Outfit] at [Travel Destination or Type of Location].

Activity: [Walking / Exploring / Sitting at a Cafe / Enjoying a View / Other]

Pose: [Describe Pose]

Mood: [Relaxed / Cheerful / Adventurous / Other]

Lighting: [Morning Sunlight / Golden Hour / Overcast Daylight / Other]

Maintain realistic environmental details, natural body proportions, consistent hairstyle and facial features. The background should look believable and should not distract from the character.

Aspect Ratio: [4:5 / 9:16]
इन prompts में आप केवल जरूरी जानकारी बदल सकते हैं। अगर आप अपने character को एक ही outfit में अलग-अलग locations पर दिखाना चाहते हैं, तो outfit की जानकारी स्थिर रखें और केवल location तथा pose बदलें।
8. AI Influencer के लिए video कैसे बनाएं?
अगर आप अपने character को बोलते हुए, चलते हुए या camera के सामने expressions देते हुए दिखाना चाहते हैं, तो image-to-video tool का इस्तेमाल कर सकते हैं।
Image-to-video में एक स्थिर image को input के रूप में दिया जाता है। AI उस image से movement वाली clip तैयार करने की कोशिश करता है।
सामान्य workflow यह है।
- अपने character की अच्छी portrait image चुनें।
- ऐसा video tool खोलें जो image input स्वीकार करता हो।
- Reference image upload करें।
- Character की movement को साफ शब्दों में लिखें।
- Video generate करके facial movement, hands और background की जांच करें।
Editable image-to-video prompt
Animate the fictional adult character [Character Name] using the supplied reference image.

Action: [Describe the Movement]

Facial Expression: [Gentle Smile / Confident Expression / Surprise / Other]

Head Movement: [Small Natural Turn / Looking at Camera / Other]

Body Movement: [Standing Naturally / Walking Slowly / Showing an Outfit / Other]

Hair Movement: [Still / Gentle Breeze / Natural Movement]

Camera Movement: [Static Camera / Slow Push-In / Gentle Pan]

Environment: [Describe Background and Atmosphere]

Preserve the character's recognizable face, hairstyle, skin tone, clothing and signature features. Use natural human movement, realistic blinking and believable body motion.

Avoid sudden movements, distorted facial features, changing clothes, unnatural hands and unintended identity changes.

Duration: [Desired Duration Supported by the Tool]

Aspect Ratio: [9:16 / 16:9]
अगर आप Instagram Reels बना रहे हैं, तो 9:16 vertical format उपयोगी रहेगा। लेकिन केवल ratio बदलने से video की quality या facial consistency अपने आप बेहतर नहीं होती।
9. AI Influencer के लिए Instagram profile कैसे बनाएं?
Character की images और videos तैयार होने के बाद उसके लिए social media profile बना सकते हैं।
सबसे पहले एक ऐसा username चुनें जो आसानी से याद रखा जा सके। फिर profile photo, bio और content niche तय करें।
उदाहरण के लिए, किसी fictional fashion influencer की bio इस तरह हो सकती है।
[Character Name] | Virtual Creator

[Country or City]

[Main Content Niche]

Fashion, beauty and everyday style.

Fictional AI-generated personality.
Username और profile name की उपलब्धता platform पर जांचें। Profile पर character को वास्तविक व्यक्ति बताने के बजाय उसकी fictional और AI-generated पहचान स्पष्ट रखें।
Instagram ने 31 अगस्त 2026 को AI-generated profile label के बारे में नई घोषणा की थी। Platform ने बताया कि AI-generated व्यक्ति वाले profiles पर disclosure नहीं होने पर उनकी reach सीमित की जा सकती है। इसलिए account बनाते समय Instagram की मौजूदा labeling requirements जांचें।
10. AI Influencer के लिए content ideas
आपका character केवल अलग-अलग तस्वीरें पोस्ट करने तक सीमित नहीं होना चाहिए। उसके niche के अनुसार उपयोगी और दिलचस्प content भी तैयार करें।
- Fashion
- Outfit combinations, seasonal fashion, styling tips और traditional तथा western looks।
- Beauty
- Makeup looks, skincare routines और beauty product presentations।
- Lifestyle
- Cafe scenes, daily routine concepts, home aesthetics और casual moments।
- Travel
- Travel-inspired visuals, destination concepts और weekend getaway ideas।
अगर आपका character किसी वास्तविक जगह पर नहीं गया है, तो image को वास्तविक यात्रा का प्रमाण बताने के बजाय AI-generated scene या creative concept के रूप में पेश करें।
एक आसान weekly content plan
| दिन | Content idea |
|---|---|
| सोमवार | Fashion photo |
| बुधवार | Beauty या styling tip |
| शुक्रवार | Short lifestyle Reel |
| रविवार | Carousel या audience question |
यह केवल एक उदाहरण है। आप अपनी सुविधा के अनुसार सप्ताह में एक, दो या अधिक posts भी बना सकते हैं।
11. AI Influencer बनाने में कितना खर्च आएगा?
खर्च इस बात पर निर्भर करेगा कि आप कौन सा tool चुनते हैं और कितनी images या videos बनाते हैं।
शुरुआत में free credits वाले tools आजमा सकते हैं, अगर वे आपके account पर उपलब्ध हों। Paid subscription लेने से पहले ये बातें जांचें।
- कितनी images या videos बनाने की सुविधा मिलती है।
- Reference images का उपयोग किया जा सकता है या नहीं।
- Generated content को commercial purposes के लिए इस्तेमाल करने की अनुमति है या नहीं।
- Watermark और export quality से जुड़ी क्या शर्तें हैं।
- Subscription खत्म होने पर आपकी saved images का क्या होगा।
अगर आपका उद्देश्य Instagram पर अपना पहला AI Influencer बनाना है, तो शुरुआत में बहुत सारे tools खरीदने की जरूरत नहीं है। पहले एक अच्छा portrait, कुछ outfit images और एक छोटी video बनाने की कोशिश करें।
12. आम गलतियां और उनके समाधान
गलती 1. हर image में चेहरा बदल जाना
Reference image का इस्तेमाल करें और चेहरे के स्थायी विवरणों को prompt में समान रखें। अगर tool में character reference की सुविधा है, तो उसका उपयोग करें।
गलती 2. Prompt में बहुत सारे विरोधाभासी निर्देश देना
एक ही prompt में अलग-अलग hair colors, styles और lighting conditions की अनावश्यक मांग न करें। पहले एक स्पष्ट concept बनाएं।
गलती 3. चेहरे को जरूरत से ज्यादा smooth करना
Natural skin texture, visible pores और realistic lighting जैसे विवरण लिखें। जरूरत से ज्यादा beauty filters से बचें।
गलती 4. हर generation को बिना जांचे इस्तेमाल करना
आंखों, हाथों, कपड़ों, accessories और background की जांच करें। गलत image को edit करें या दोबारा generate करें।
गलती 5. किसी वास्तविक व्यक्ति की पहचान की नकल करना
अपना original fictional character बनाएं। किसी वास्तविक व्यक्ति की तस्वीर, निजी जानकारी या likeness इस्तेमाल करने से पहले जरूरी permission और लागू नियमों का ध्यान रखें।
गलती 6. AI Influencer से तुरंत कमाई की उम्मीद करना
AI character बनाना केवल शुरुआत है। Audience, content quality, trust और business partnerships बनाने में समय लग सकता है।
13. AI Influencer से कमाई कैसे कर सकते हैं?
अगर आप अपने AI Influencer के लिए अच्छी content strategy बनाते हैं और audience विकसित करते हैं, तो भविष्य में कुछ monetization options पर काम कर सकते हैं।
- Sponsored content: Brands के लिए virtual campaign images या promotional content बनाना।
- Affiliate marketing: Affiliate links के जरिए products promote करना।
- Virtual fashion campaigns: Clothing brands के लिए fictional model images बनाना।
- Custom avatar services: दूसरे creators या businesses के लिए original AI characters बनाना।
- Digital products: Editable prompts, character templates या creative resources तैयार करना।
इन तरीकों से कमाई की संभावना है, लेकिन income की कोई गारंटी नहीं है। Commercial work करने से पहले संबंधित tool की usage terms, product rights और sponsorship disclosure requirements जांचें।
15. निष्कर्ष
अपना AI Influencer बनाने के लिए सबसे पहले character की पहचान तय करें। फिर एक मुख्य portrait बनाएं, उसे reference image के रूप में रखें और उसी character के लिए अलग-अलग outfits, locations और poses वाले prompts तैयार करें।
आपको हर बार शुरुआत से prompt लिखने की जरूरत नहीं है। इस लेख में दिए गए editable templates में [Character Name], [Hair Color], [Outfit], [Location] और दूसरे square brackets को अपनी पसंद के अनुसार बदलकर इस्तेमाल कर सकते हैं।
इस तरह आप Fashion, Beauty, Travel, Lifestyle या किसी दूसरे niche के लिए अपना original fictional character तैयार कर सकते हैं।