 PromptDon

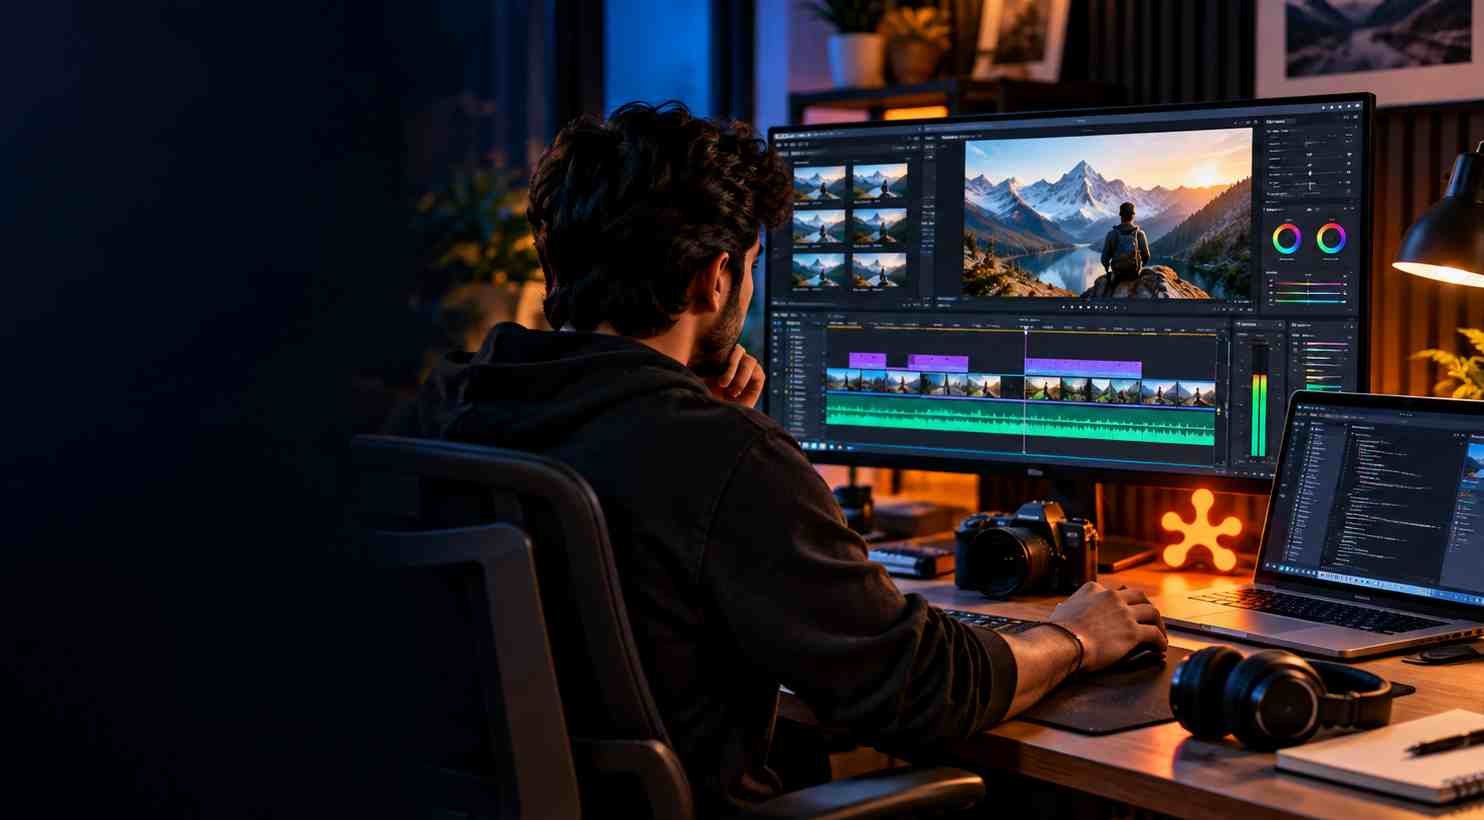
क्या आप YouTube videos, tutorials, talking-head videos या Shorts edit करने में बहुत समय लगाते हैं? क्या आप चाहते हैं कि AI आपकी raw footage को समझने, rough cut तैयार करने, captions बनाने, graphics लगाने और revisions में मदद करे?
Claude Code जैसे AI coding agent के साथ ऐसा workflow बनाया जा सकता है। सही setup होने पर AI आपके project की files पढ़ सकता है, scripts बना सकता है और उपलब्ध tools या integrations के जरिए कुछ editing tasks में मदद कर सकता है। लेकिन एक बात शुरुआत में ही समझ लें: सिर्फ Claude Code install करने या एक prompt लिखने से हर video editor अपने आप पूरी तरह automate नहीं हो जाता। वास्तविक परिणाम आपके editing software, compatible tools, permissions, project files और instructions पर निर्भर करते हैं।
इस guide में हम एक practical और beginner-friendly तरीका समझेंगे। आप सीखेंगे कि project folder कैसे बनाना है, Claude Code को सही folder में कैसे चलाना है, editing instructions कैसे लिखनी हैं, AI से पहले छोटा test कैसे करवाना है और final video को publish करने से पहले क्या-क्या check करना है।
यह guide किसके लिए है? YouTube creators, video editors, freelancers, educators, podcasters और उन लोगों के लिए जो editing के repetitive काम कम करना चाहते हैं। Programming का expert होना जरूरी नहीं, लेकिन setup के दौरान terminal में कुछ basic commands चलानी पड़ सकती हैं।
महत्वपूर्ण: यह एक workflow guide है, कोई ready-made editing application या verified one-click package नहीं। यहां दिए गए folder names और prompts शुरुआती ढांचा हैं। आपके system में वास्तविक editing तभी होगी जब चुने गए editor के लिए compatible workflow या integration उपलब्ध हो और उसका test सफल हो।
इस guide में आप क्या सीखेंगे?
- AI-assisted video editing क्या है और यह कैसे काम करती है।
- Claude Code और सामान्य Claude chat में क्या अंतर है।
- एक साफ project folder कैसे बनाएं।
- AI से पहले project का audit और plan कैसे बनवाएं।
- Copy-paste prompts से rough cut, captions, graphics और revisions कैसे plan करें।
- Premiere Pro, DaVinci Resolve और CapCut के साथ काम शुरू करने से पहले compatibility कैसे जांचें।
- गलत cuts, captions, missing media और export problems को कैसे troubleshoot करें।
- Privacy, copyright, costs और quality control का ध्यान कैसे रखें।
1. AI Video Editing क्या है?

AI Video Editing का अर्थ है video production के कुछ कामों में Artificial Intelligence की मदद लेना। उदाहरण के लिए, speech को text में बदलना, transcript से rough cut बनाना, लंबे pauses पहचानना, captions का draft तैयार करना, footage के लिए B-roll ideas देना, graphics की planning करना और editing instructions को व्यवस्थित करना।
यहां दो अलग चीजें समझना जरूरी है:
- AI से editing advice लेना: आप footage या transcript के बारे में जानकारी देते हैं और AI आपको cut points, captions या graphics के सुझाव देता है। यह सलाह है, जरूरी नहीं कि timeline भी अपने आप बदल जाए।
- AI से editing tasks करवाना: AI agent को files, scripts या compatible integration के जरिए actual project पर काम करने की अनुमति मिलती है। यह तभी संभव है जब आवश्यक tools उपलब्ध हों और वे सही तरह configure किए गए हों।
उदाहरण के लिए, आप 15 मिनट का tutorial record करते हैं। उसमें लंबे pauses, दोहराए गए वाक्य और कुछ जगहों पर screen recording या graphic की जरूरत है। AI transcript की मदद से संभावित cut points पहचान सकता है, graphics की सूची बना सकता है और edit plan तैयार कर सकता है। यदि आपके पास tested editing integration है, तो workflow कुछ बदलाव project में लागू भी कर सकता है। लेकिन final timeline, audio और export को इंसान द्वारा review करना अभी भी समझदारी है।
2. Claude Code क्या है?

Claude Code, Anthropic का coding agent है। इसे project files को समझने, code लिखने और उपलब्ध tools के साथ काम करने के लिए बनाया गया है। यह सामान्य chat window में जवाब देने से अलग workflow है: आप इसे किसी project folder में चला सकते हैं और इसकी मदद से उस project के files और code पर काम कर सकते हैं।
Video editing के संदर्भ में Claude Code को एक coordinator की तरह समझें। वह project instructions पढ़ सकता है, automation scripts लिखने में मदद कर सकता है, उपलब्ध integration का उपयोग कर सकता है और task के चरण व्यवस्थित कर सकता है। लेकिन Claude Code खुद कोई universal video editor नहीं है। वह किसी भी application में बिना integration के हर button दबा सके, इसकी गारंटी नहीं है।
Official setup instructions के लिए Claude Code की Getting Started Guide देखें। Installation के तरीके और system requirements समय के साथ बदल सकते हैं, इसलिए commands चलाने से पहले official guide को प्राथमिकता दें।
3. कौन-कौन से tools चाहिए?
Claude Code
यह इस workflow का coding-agent हिस्सा है। इसे official documentation के अनुसार install और authenticate करें। इसे ऐसे folder में चलाएं जहां सिर्फ उसी video project से जुड़ी files हों। शुरुआत में अपने पूरे Documents या Desktop folder को इसका working folder न बनाएं।
एक video editor
आप अपने मौजूदा editor से शुरुआत कर सकते हैं। नीचे कुछ आम विकल्प दिए गए हैं, लेकिन हर editor के लिए automation की क्षमता अलग होती है।
| Software | किस काम के लिए उपयोगी | Automation शुरू करने से पहले |
|---|---|---|
| Adobe Premiere Pro | Long-form videos, interviews, tutorials और professional timeline editing | Premiere के built-in features और external automation को अलग समझें। Adobe का Text-Based Editing transcript के जरिए rough cut बनाने में मदद करता है, लेकिन वह अपने आप Claude Code integration नहीं बन जाता। |
| DaVinci Resolve | Editing, color correction, visual effects और audio post-production | Resolve के scripting options और आपके installed edition/version की compatibility जांचें। किसी खास script या integration को test किए बिना working न मानें। |
| CapCut | Short-form videos और social content | अपने desktop/web version में जरूरी automation options की पुष्टि करें। केवल CapCut install होने से external AI agent को पूर्ण control नहीं मिलता। |
| अन्य editors | आपका मौजूदा workflow | देखें कि editor project files, scripting, command-line tools या supported integrations के जरिए कौन-से काम कर सकता है। |
Adobe Premiere के Text-Based Editing feature के बारे में इसकी official guide पढ़ सकते हैं। DaVinci Resolve के लिए शुरुआत Blackmagic Design की official website से करें। किसी third-party script या MCP server को जोड़ने से पहले उसकी source, permissions और current compatibility की जांच करें।
Media files
आपको अपनी raw footage, जरूरत के अनुसार music, logos, images, screen recordings और दूसरे assets चाहिए होंगे। केवल वही assets इस्तेमाल करें जिनका उपयोग करने का अधिकार आपके पास है। किसी website से image या video डाउनलोड कर लेना अपने आप commercial use की permission नहीं देता।
Optional: scripts या MCP integration
कुछ workflows scripts, APIs या MCP (Model Context Protocol) जैसे integration का उपयोग कर सकते हैं। MCP एक open protocol है जो AI applications को external tools और data sources से जोड़ने का standard तरीका देता है। इसे USB-C port जैसी व्यवस्था समझ सकते हैं: connector standard हो सकता है, लेकिन उससे कौन-सा device काम करेगा, यह उस device और implementation पर निर्भर करता है।
ध्यान दें: कोई MCP server उपलब्ध होना इस बात का प्रमाण नहीं है कि वह आपके video editor के हर feature को support करता है। उसके documentation में supported operations, permissions, installation steps और known limitations पढ़ें। संदर्भ के लिए Anthropic की MCP documentation देखें।
4. सबसे पहले छोटा test project बनाएं
शुरुआत में अपनी सबसे जरूरी client video या लंबी YouTube recording पर experiment न करें। 30 से 60 सेकंड की ऐसी sample clip चुनें जिसकी backup copy आपके पास हो। उसमें साफ speech हो और एक-दो visuals हों। इस test का उद्देश्य यह पता लगाना है कि आपका setup files पढ़ सकता है या नहीं, चुने गए tools उपलब्ध हैं या नहीं और कोई change करने से पहले backup बन रहा है या नहीं।
- एक नई folder बनाएं जिसका नाम
AI-Video-Editor-Testरखें। - उसमें sample video और जरूरी assets की copies रखें। Original footage को अलग जगह सुरक्षित रखें।
- अपना editor manually खोलें और पुष्टि करें कि sample video सही तरह import और play हो रही है।
- Claude Code को official guide के अनुसार install और sign in करें।
- Terminal या command prompt में अपने test folder तक जाएं और वहीं से Claude Code session शुरू करें।
- पहले AI से केवल files और available tools का audit कराएं। उसे अभी project बदलने या files delete करने की अनुमति न दें।
यदि terminal या installation का अनुभव नहीं है, तो अपने operating system के लिए official Claude Code setup guide में दिए गए steps follow करें। किसी अनजान website से copy की गई installation command न चलाएं।
5. Project folder को व्यवस्थित कैसे करें?
अलग-अलग files को साफ तरीके से रखने से AI और इंसान, दोनों के लिए project समझना आसान होता है। नीचे एक suggested folder structure है। यह किसी downloaded package का असली file tree नहीं, बल्कि आपके workflow को व्यवस्थित रखने का उदाहरण है।
AI-Video-Editor-Test/
├── CLAUDE.md
├── instructions/
│   ├── project-brief.md
│   └── quality-checklist.md
├── footage/
│   └── source-video.mp4
├── assets/
│   ├── music/
│   ├── images/
│   ├── logos/
│   └── b-roll/
├── transcripts/
├── presets/
│   ├── youtube-long-form.md
│   ├── talking-head.md
│   └── shorts-vertical.md
├── projects/
├── scripts/
├── review/
└── exports/
इन folders का काम
footage: original video clips की copies।assets: music, logos, images और legally usable B-roll।transcripts: transcript files और timecodes।presets: बार-बार इस्तेमाल होने वाले editing rules और style instructions।projects: editor project files या intermediate project versions।scripts: automation scripts, यदि आपके workflow में जरूरी हों।review: AI का edit plan, review notes और issues list।exports: preview और final render।
हर project को इन सभी folders की जरूरत नहीं होती। अगर आपका setup केवल transcript और editing plan बनाता है, तो scripts या project files का folder खाली रह सकता है। खाली folder होने से automation अपने आप चालू नहीं हो जाती।
AI Context Window क्या है? AI की Memory कैसे काम करती है? पूरी जानकारी आसान हिंदी में
Meta ने Muse Wonder AI मॉडल पेश किए, जानें नए फीचर्स
6. CLAUDE.md में project instructions लिखें
Project की root folder में CLAUDE.md नाम की text/Markdown file बनाई जा सकती है। इसमें AI को project के नियम, folder structure और safety requirements समझाएं। यह file instructions देने के लिए है, video editor से connection बनाने के लिए नहीं।
नीचे शुरुआती template है। इसे अपनी जरूरत के हिसाब से edit करें:
# Video Editing Project Instructions

## Project goal
Help me prepare a clean, engaging edit from the supplied footage.

## Working rules
- Read the project brief before starting.
- Inspect the available files and tools before proposing changes.
- Do not claim that an edit was applied unless you can verify it.
- If the editor cannot be controlled through an available tool or script, explain the limitation and provide a manual workflow.
- Never delete or overwrite original footage.
- Keep source files unchanged. Work on copies.
- Ask before downloading external assets or using any asset with unclear licensing.
- Do not publish, upload, or share anything without my explicit approval.
- Do not run destructive commands or install packages without explaining what they do and getting approval.
- Keep a log of changes and unresolved issues.
- If a task is not supported by the current setup, stop and explain why.

## Editing style
- Prioritize clear storytelling and understandable dialogue.
- Avoid cutting words, breaths, or pauses so aggressively that speech sounds unnatural.
- Keep music lower than dialogue.
- Use captions only after checking spelling, punctuation, timing, and line breaks.
- Do not invent quotes, facts, logos, or visual evidence.
- Use only supplied or properly licensed assets.

## Before export
- Confirm the actual timeline or render exists.
- Check audio, picture, captions, aspect ratio, frame rate, resolution, and file location.
- Report any checks you could not perform.
यह template safety और consistency के लिए है। इसे डालने से Premiere, Resolve या CapCut का कोई integration अपने आप install नहीं होता। उस हिस्से के लिए editor-specific documentation और compatible tool की जरूरत होगी।
7. पहला prompt: AI से setup audit करवाएं
यह सबसे जरूरी step है। बहुत से लोग सीधे “मेरी video edit कर दो” लिख देते हैं। यदि AI को यह पता ही नहीं कि editor कैसे control होगा, कौन-सी files उपलब्ध हैं और कौन-से tools install हैं, तो वह गलत assumptions बना सकता है। शुरुआत में उससे audit करवाएं।
Copy-paste prompt
We are setting up a video-editing workflow in this project folder.First, inspect the project files and read CLAUDE.md.
Do not edit, delete, move, overwrite, upload, or download anything yet.
Please report:

Which source media and assets are present.
Which video editor I intend to use, if stated in the project files.
Which editing tools, scripts, APIs, or integrations are actually available in this environment.
Which capabilities you can verify and which are only assumptions.
What is missing before you can safely perform an edit.
A minimal test plan using a copy of a short sample clip.
Any security, privacy, licensing, or data-loss risks.

Do not claim that you can control the editor unless you can identify a real, available method.
Do not install dependencies or run destructive commands.
Finish with a step-by-step plan and wait for my approval.
Expected result: AI को आपको files की सूची, missing items और next steps बताने चाहिए। यदि वह बिना evidence के कहता है कि वह सभी editors को control कर सकता है, तो उससे specific tool या script का नाम, documentation और test method पूछें।
8. दूसरा prompt: editing brief तैयार करें
Audit के बाद अपनी video का उद्देश्य और style स्पष्ट करें। “इसे अच्छा बना दो” बहुत vague instruction है। AI को audience, platform, duration, pacing और visual style की जानकारी दें।
Copy-paste project brief
Prepare an edit plan for this video. Do not modify the editor project yet.Video type: [YouTube tutorial / talking-head / interview / Short]
Target platform: [YouTube / Instagram Reels / YouTube Shorts]
Target aspect ratio: [16:9 / 9:16 / 1:1]
Target duration: [enter a realistic range]
Audience: [describe the intended viewers]
Language: [Hindi / Hinglish / English / other]
Tone: [friendly / educational / energetic / calm]
Editing pace: [relaxed / medium / fast, but natural]
Captions: [yes/no, language and style]
Music: [supplied file path or none]
Brand assets: [logo and brand file paths, if any]
Please:

Review the available footage and transcript.
Suggest an opening hook based only on what is actually said or shown.
Identify possible pauses, repeated lines, mistakes, and sections that may be shortened.
Preserve meaning and avoid cutting words or breaths unnaturally.
Suggest where graphics or B-roll would clarify the explanation.
Mark every suggested cut with a timestamp or transcript quote when possible.
Separate confirmed observations from suggestions.
List missing information and questions.
Save the edit plan in review/edit-plan.md if file creation is available.
Do not apply the edit until I approve the plan.
Brackets वाली जानकारी को अपनी video के अनुसार भरें। अगर आपको exact duration नहीं पता, तो उसे अनुमान के रूप में लिखें और AI से पहले footage review करने को कहें।
9. Rough cut कैसे बनवाएं?
Rough cut का अर्थ है video का शुरुआती edit, जिसमें मुख्य कहानी और जरूरी dialogue सही क्रम में रखे जाते हैं। यह final polish नहीं है। इस stage पर transitions, sound effects और heavy graphics के बजाय content और pacing पर ध्यान दें।
यदि आपके पास केवल transcript है, तो AI संभावित cut points का सुझाव दे सकता है, लेकिन transcript अकेले हर visual detail नहीं बताता। यदि आपके पास supported editor integration है, तो उससे copy project पर बदलाव करने को कहा जा सकता है। पहले यह स्पष्ट कर लें कि वह actual timeline बदल सकता है या केवल edit decision list बना सकता है।
Copy-paste prompt
Using the approved edit plan, prepare a rough-cut proposal.Rules:

Preserve the original meaning and factual accuracy.
Do not remove a sentence just because it contains a pause.
Flag repeated phrases and long dead air, but show the proposed in/out points.
Do not create jump cuts that remove parts of words.
Do not invent missing dialogue.
Keep the original source media untouched.
If a working editor integration is available, create changes only in a duplicate project.
If no editor integration is available, produce a timestamped edit decision list instead of claiming the timeline was edited.

Deliver:

A list of proposed cuts with reasons.
Any uncertain cut points that need human review.
A record of the project or files changed.
A list of steps that still require manual action.
Quality tip: Natural pauses और breathing पूरी तरह हटाना जरूरी नहीं है। बहुत तेज cuts से speaker robotic लग सकता है और बात समझना कठिन हो सकता है। Content का meaning और speaker की natural delivery सबसे पहले आती है।
10. Captions और subtitles तैयार करना
Captions में spelling, punctuation, timing और line breaks महत्वपूर्ण हैं। Hindi और Hinglish content में AI कभी-कभी नाम, English technical terms, brand names और बोलचाल के शब्द गलत लिख सकता है। इसलिए auto-generated captions को बिना देखे publish न करें।
Adobe Premiere Pro में Text-Based Editing के जरिए speech transcript बनाया जा सकता है और transcript में edits timeline पर reflect हो सकते हैं। Adobe की documentation के अनुसार यह feature dialogue वाली footage के लिए है; captions बनाने का workflow अलग हो सकता है। विवरण के लिए Adobe की Text-Based Editing guide देखें। यह Premiere का built-in feature है, Claude Code के साथ third-party integration का प्रमाण नहीं।
Copy-paste caption review prompt
Review the supplied transcript for captions.Language: [Hindi / Hinglish / English]
Audience: [describe audience]
Preferred script: [Devanagari / Latin script / mixed]
Brand and product names: [list exact spellings]
Tasks:

Correct obvious spelling and punctuation errors without changing meaning.
Preserve the speaker's intended wording.
Flag unclear words instead of guessing.
Keep caption lines short enough to read comfortably on a phone.
Do not paraphrase the dialogue unless I explicitly ask for rewritten captions.
Return a table with timestamp (if available), original text, suggested caption, and confidence/notes.
Mark any name, number, quotation, or technical term that needs human verification.

Do not claim that captions have been added to the video unless the actual editor project or rendered file confirms it.
11. Graphics, B-roll और screen recordings
Graphics का काम सिर्फ video को चमकदार बनाना नहीं है। उन्हें viewer को कोई concept समझने, example देखने या important information याद रखने में मदद करनी चाहिए। हर sentence पर animation या sound effect लगाने से video cluttered हो सकती है।
AI से पहले graphics की सूची बनवाएं। फिर प्रत्येक graphic के लिए यह तय करें कि वह किस बात को समझाएगा, उसका source क्या है और क्या उसे इस्तेमाल करने की permission है। किसी brand logo, YouTube thumbnail, movie clip या website image को online देखकर अपने video में इस्तेमाल करना हमेशा allowed नहीं होता। Copyright और platform rules लागू हो सकते हैं।
Copy-paste visual planning prompt
Review the approved script or transcript and prepare a visual-support plan.For every suggested visual, include:

Timestamp or spoken phrase it supports.
Purpose: explain, compare, emphasize, demonstrate, or provide context.
Type: text graphic, chart, screenshot, screen recording, supplied image, or B-roll.
Exact asset needed.
Whether the asset is already supplied or still needs to be sourced.
Any copyright, privacy, or factual-verification concern.
A simple alternative if the asset cannot be obtained legally.

Rules:

Do not invent a real logo, statistic, screenshot, quote, or news image.
Do not download or use external assets without approval.
Prefer supplied assets and original screen recordings.
Avoid visuals that distract from the speaker.
If a visual is only an idea, label it as a suggestion, not as a completed edit.
अगर आपको किसी software का walkthrough दिखाना है, तो अपना screen recording खुद बनाना अक्सर बेहतर होता है। इससे viewer को वास्तविक interface और सही steps दिखते हैं। यदि screen recording में customer data, passwords, email addresses या private dashboards दिखते हों, तो उन्हें blur या crop करें।
12. Background music और sound effects
Music narration को support करे, उससे मुकाबला न करे। Dialogue के नीचे music इतना तेज न रखें कि शब्द सुनना कठिन हो जाए। Sound effects का इस्तेमाल तभी करें जब वे action या visual को समझने में मदद करें। हर cut पर whoosh या impact sound लगाना जरूरी नहीं।
Copy-paste audio review prompt
Prepare an audio review checklist for this video.Check, where the available tools allow:

Dialogue clarity and consistency.
Sudden loudness changes.
Clipping, distortion, hum, and distracting background noise.
Music that masks the voice.
Abrupt audio cuts or mismatched fades.
Sound effects that feel excessive or misleading.

Do not invent audio measurements.
If you cannot listen to or analyze the actual audio, state that limitation and provide a manual listening checklist.
Do not overwrite the original audio.
List any corrections as recommendations unless a supported audio-editing tool has actually applied them.
Music और sound effects के लिए ऐसी files इस्तेमाल करें जिनका license आपके use case को अनुमति देता हो। “Free download” का अर्थ हर बार “copyright-free for commercial use” नहीं होता। License conditions और attribution requirements पढ़ें।
13. Color correction और visual consistency
Color correction का उद्देश्य footage को natural और consistent बनाना है। अलग-अलग shots में skin tone, white balance और exposure बहुत बदल रहे हों, तो उन्हें संतुलित करने की जरूरत पड़ सकती है। लेकिन बिना reference के हर video पर एक जैसा cinematic filter लगाना सही तरीका नहीं है।
AI से पहले एक color-review checklist या suggested settings मांगें। फिर actual footage देखकर निर्णय लें। यदि AI के पास video frames या editor controls तक पहुंच नहीं है, तो वह वास्तविक image को जांचने के बजाय सिर्फ सामान्य सुझाव दे सकता है।
Copy-paste color prompt
Review the supplied representative frames or available color notes.Goal: natural, consistent footage that matches the intended style.
Please:

Identify visible exposure, white-balance, contrast, or shot-matching issues.
Distinguish what you can directly observe from what you cannot verify.
Suggest conservative corrections first.
Preserve natural skin tones and important detail.
Avoid clipping highlights or crushing shadows.
Do not claim that a grade has been applied unless the editor project confirms it.
Recommend a before/after comparison on representative shots.

If you cannot inspect the actual footage, say so and provide a manual checklist instead.
14. Final polish से पहले review करवाएं
जब rough cut, captions और graphics तैयार हों, तब final polish की बारी आती है। इस चरण में pacing, visual consistency, audio levels, transitions और title cards को जांचा जा सकता है। किसी भी automatic process को पूरा होने का दावा करने से पहले actual project या output file की पुष्टि करें।
Copy-paste final review prompt
Review the current edit against the approved brief and quality checklist.Check the following only where you have access to reliable evidence:

The opening clearly communicates the topic.
The story follows a sensible order.
No important sentence, word, or context was accidentally removed.
Captions match the spoken words and are timed correctly.
Graphics support the point being discussed.
Music does not overpower dialogue.
No missing media, offline clips, placeholder graphics, or accidental black frames remain.
The correct aspect ratio, frame rate, and resolution are selected.
The output location and filename are clear.

Return:

Critical issues that must be fixed.
Optional improvements.
Items you could not verify.
The exact files or project version inspected.
A final manual review checklist.

Do not export, upload, publish, or overwrite the master project without my approval.
15. Export settings कैसे तय करें?
Export settings platform, source footage और project requirements पर निर्भर करती हैं। YouTube long-form के लिए अक्सर 16:9 layout उपयोग किया जाता है, जबकि Shorts और Reels के लिए 9:16 vertical layout आम है। फिर भी केवल aspect ratio सही होने से video सही export नहीं हो जाती। Resolution, frame rate, codec, audio, captions और final playback भी जांचें।
| Video type | आम layout | Export से पहले क्या जांचें |
|---|---|---|
| YouTube long-form | आमतौर पर 16:9 | Source और project के अनुसार resolution/frame rate, readable text, clean audio, correct thumbnail/title assets |
| YouTube Shorts / Instagram Reels | आमतौर पर 9:16 | Vertical framing, safe text margins, captions, platform UI से न ढकने वाले important visuals |
| Square social video | 1:1, यदि brief यही कहता हो | Crop, text readability और platform requirements |
किसी एक resolution या bitrate को हर project के लिए universal setting न मानें। अपने platform की current recommendations और source footage की properties देखें। Export के बाद rendered file को शुरुआत, बीच और अंत से चलाकर जांचें। यदि संभव हो तो पूरा video एक बार सुनें और देखें।
16. MCP और integrations: इन्हें कब जोड़ना चाहिए?
MCP का उद्देश्य AI application और external tools के बीच standardized connection देना है। लेकिन MCP नाम होने से कोई tool अपने आप सुरक्षित या compatible नहीं बन जाता। अलग-अलग servers अलग capabilities और permissions देते हैं।
किसी MCP server या third-party integration को जोड़ने से पहले ये सवाल पूछें:
- क्या इसका official या trustworthy documentation उपलब्ध है?
- क्या यह आपके editor के current version को support करता है?
- क्या यह सिर्फ project information पढ़ सकता है या files/timeline में बदलाव भी कर सकता है?
- क्या यह local files, network, browser या accounts तक पहुंच मांगता है?
- क्या permissions सीमित की जा सकती हैं?
- क्या changes को undo करना और logs देखना संभव है?
- क्या इसका छोटा, non-critical test सफल हुआ?
शुरुआत में broad permissions या permission prompts को पूरी तरह bypass करने से बचें। Claude Code के official docs में permissions और tool configuration के बारे में पढ़ें। CLI reference और MCP documentation से शुरुआत कर सकते हैं। Commands और settings के लिए हमेशा current documentation को प्राथमिकता दें।
17. क्या पूरा editing workflow automate हो सकता है?
कुछ workflows में बहुत-से repetitive steps automate हो सकते हैं, लेकिन “पूरी तरह autonomous” होना एक अलग दावा है। यह आपकी footage, software, integration और quality expectations पर निर्भर करता है। Talking-head video का rough cut और highly creative documentary edit एक जैसे tasks नहीं हैं।
Automation को चार levels में समझना आसान है:
- Level 1: Suggestions. AI transcript, edit plan, title ideas और captions का draft देता है। Timeline आप manually edit करते हैं।
- Level 2: File assistance. AI scripts, subtitle files, shot lists या review documents तैयार करता है। आप उन्हें अपने editor में import या apply करते हैं।
- Level 3: Connected editing. Tested script या integration supported operations को duplicate project पर लागू कर सकता है। हर operation की सीमा और reliability अलग होती है।
- Level 4: Multi-step workflow. कई connected tools मिलकर rough cut, captions, graphics और export जैसे steps में मदद कर सकते हैं। फिर भी errors, missing media, creative judgement और final review की जरूरत रह सकती है।
अपनी शुरुआत Level 1 या Level 2 से करना सबसे आसान है। जब वह workflow भरोसेमंद हो जाए, तभी connected editing और ज्यादा automation की तरफ बढ़ें।
18. कितना खर्च आएगा?
इसका कोई एक fixed जवाब नहीं है। कुल खर्च में AI subscription या API usage, editing software, plugins, storage, music/assets licenses और setup में लगने वाला समय शामिल हो सकता है। कुछ editors के built-in features subscription में शामिल हो सकते हैं, जबकि कुछ automation integrations अलग से configure या maintain करने पड़ सकते हैं।
जिस creator के video transcript पर यह guide आधारित है, उसने अपने अनुभव में लगभग $5 प्रति edit और लगभग 2 से 3 घंटे का editing time बताया था। ये उस creator के अपने estimates हैं, independent benchmark या हर user के लिए guaranteed result नहीं। आपके video की लंबाई, revisions, model usage, software, computer और integration के अनुसार लागत और समय काफी बदल सकते हैं।
शुरुआत में एक simple spreadsheet या log रखें:
- एक video पर setup और editing में कुल कितना समय लगा।
- AI usage या subscription का कितना हिस्सा इस्तेमाल हुआ।
- कितनी manual revisions करनी पड़ीं।
- कितनी errors मिलीं और उन्हें ठीक करने में कितना समय लगा।
- Final result manual workflow के मुकाबले कितना उपयोगी रहा।
चार से पांच वास्तविक projects के बाद अपने workflow की औसत लागत और समय का बेहतर अनुमान मिल सकता है। केवल एक सफल demo देखकर बड़े savings का दावा न करें।
19. आम समस्याएं और उनके समाधान
| समस्या | संभावित कारण | क्या करें |
|---|---|---|
| Claude Code editor को control नहीं कर पा रहा | Compatible integration नहीं है, गलत configure है या requested operation supported नहीं है | AI से actual available tools और documentation दिखाने को कहें। जरूरत हो तो edit decision list बनवाकर manual edit करें। |
| AI कहता है कि edit पूरा हो गया, लेकिन timeline नहीं बदली | AI ने plan या instructions दिए, actual editor action नहीं हुआ | Project file, change log और rendered output verify करें। बिना evidence के task complete न मानें। |
| गलत words कट गए | Transcript error, inaccurate timestamps या बहुत aggressive cuts | Original audio से compare करें, in/out points सुधारें और conservative cuts रखें। |
| Captions में spelling गलत है | Speech recognition की गलती, खासकर names और Hinglish में | Transcript को manually proofread करें और proper nouns की exact spelling तय करें। |
| Music बहुत तेज है | Dialogue और music का संतुलन सही नहीं | Headphones और speakers दोनों पर सुनें; voice को साफ और समझने योग्य रखें। |
| Graphics गलत या irrelevant हैं | AI ने context गलत समझा या unverified asset चुना | हर graphic को spoken line से match करें और source/licensing verify करें। |
| Export file नहीं मिल रही | Wrong output path, failed render या export शुरू ही नहीं हुआ | Editor के export status, output folder और file playback को verify करें। |
| Workflow बहुत धीमा है | Long footage, repeated analysis, large files या inefficient tool setup | Short test clip से profile करें, stages में काम करें और unnecessary reruns कम करें। |
| AI गलत files बदल देता है | Project boundaries या permissions साफ नहीं थीं | Backup रखें, copies पर काम करें, scope सीमित करें और destructive actions के लिए approval लें। |
20. Privacy और security के नियम
Video projects में personal information, client material, unpublished business details और private conversations हो सकती हैं। किसी भी AI tool या third-party integration को इस्तेमाल करने से पहले समझें कि कौन-सी files और data उसके पास जा सकते हैं।
- Original footage और project का backup रखें।
- पहले sample project पर test करें।
- Passwords, API keys, access tokens या private credentials को prompt या public project file में न डालें।
- अनजान scripts और commands को समझे बिना execute न करें।
- किसी tool को जरूरत से ज्यादा file या network permissions न दें।
- Client footage upload करने से पहले client agreement और privacy requirements जांचें।
- AI को video publish, upload, delete या share करने की अनुमति तभी दें जब इसकी स्पष्ट जरूरत हो और आपने approval दिया हो।
- हर महत्वपूर्ण बदलाव का record रखें ताकि गलती होने पर पता लगाया जा सके।
21. Copyright और factual accuracy
AI-generated editing में copyright और factual mistakes का खतरा बना रहता है। किसी दूसरे creator की thumbnail, movie scene, music track, logo, photo या screen recording को बिना जांचे इस्तेमाल न करें। Publicly accessible होना commercial use की permission नहीं है।
इसी तरह, AI से generated chart, quote, statistic या screenshot को असली evidence की तरह न दिखाएं। अगर visual किसी real product या website को represent करता है, तो उसे सही source से verify करें। यदि source verify नहीं हो सकता, तो visual को हटाएं या clearly illustrative label दें।
22. एक आसान end-to-end workflow
अगर आप पहली बार यह system बना रहे हैं, तो नीचे दिए गए क्रम को अपनाएं। हर step का result check करने के बाद ही अगले step पर जाएं।
- Backup: Original footage और assets की copies बनाएं।
- Project folder: Files को साफ structure में रखें।
- Audit: Claude Code से available files और tools की report लें।
- Brief: Audience, video type, language, duration और style तय करें।
- Transcript: यदि जरूरी हो, transcript बनाएं और गलत words सुधारें।
- Edit plan: Proposed cuts, graphics और B-roll की list बनवाएं।
- Approval: Edit plan को पढ़ें और जरूरी corrections बताएं।
- Rough cut: केवल supported workflow में duplicate project पर apply करें। अन्यथा edit decision list के अनुसार manually edit करें।
- Captions और visuals: Captions proofread करें, visuals verify करें और licensed assets इस्तेमाल करें।
- Audio और color: Dialogue clarity, music balance और shot consistency check करें।
- Final review: Missing media, wrong cuts, black frames, captions और aspect ratio जांचें।
- Export: Approved settings से render करें और output file को play करके verify करें।
- Learn: Errors और revisions को presets तथा project instructions में update करें।
23. Presets कैसे बनाएं ताकि हर video में शुरुआत से काम न करना पड़े?
Preset का मतलब है बार-बार इस्तेमाल होने वाले rules और preferences को लिखकर रखना। शुरुआत में अलग-अलग software effects की लंबी सूची बनाने की जरूरत नहीं। अपने काम के हिसाब से simple presets बनाएं।
YouTube talking-head preset
Purpose: Clear and natural educational video.
Priorities:
- Preserve meaning and natural delivery.
- Remove only clearly unnecessary dead air and repeated takes.
- Keep dialogue clear above music.
- Use restrained captions and graphics.
- Add B-roll only when it supports the spoken point.
- Keep transitions simple.
- Flag uncertain cuts for approval.
- Do not invent facts, quotes, or visuals.
Short-form vertical preset
Purpose: Short vertical video for mobile viewing.
Priorities:
- Confirm the strongest real opening moment.
- Preserve the speaker's intended meaning.
- Keep framing and captions readable on a phone.
- Respect platform safe areas.
- Use quick pacing without cutting words unnaturally.
- Use only relevant, licensed visuals.
- Verify the final 9:16 output by playing the rendered file.
Tutorial / screen-recording preset
Purpose: Make software instructions easy to follow.
Priorities:
- Preserve the correct sequence of actions.
- Do not remove necessary pauses while a viewer reads the screen.
- Zoom or highlight only the relevant interface area.
- Hide personal information and credentials.
- Keep UI labels accurate.
- Do not replace real interface elements with invented screenshots.
- Check every step against the actual software.
इन presets को presets folder में अलग Markdown files के रूप में रख सकते हैं। हर project में preset को review करें, क्योंकि एक style हर video के लिए सही नहीं होता।
24. क्या आपको programming सीखनी पड़ेगी?
Basic workflow शुरू करने के लिए programming expert होना जरूरी नहीं। आप AI से brief, transcript review, shot list और edit decision list तैयार करवा सकते हैं। लेकिन अगर आप editor को सच में automate करना चाहते हैं, तो आपके चुने हुए software के लिए scripting, API या integration की जरूरत पड़ सकती है। उस स्थिति में code पढ़ने, permissions समझने और errors troubleshoot करने की थोड़ी सीख उपयोगी होगी।
AI द्वारा लिखा गया code भी गलती कर सकता है। उसे run करने से पहले समझें कि वह कौन-सी files बदलता है, कौन-से packages install करता है और क्या network access मांगता है। किसी command का उद्देश्य स्पष्ट न हो तो AI से पहले उसे समझाने को कहें।
25. इस workflow की सीमाएं
- हर editor और हर version में समान automation options उपलब्ध नहीं होते।
- Transcript में गलतियां हों तो edit decisions भी गलत हो सकते हैं।
- AI का visual judgement inconsistent हो सकता है।
- Automatic graphics में incorrect details या unsuitable assets आ सकते हैं।
- Long-form, multi-camera या highly creative edits के लिए अधिक human direction लग सकती है।
- Rendering, media decoding और export की speed आपके computer और software पर निर्भर करती है।
- Subscription plans, usage limits और pricing बदल सकते हैं।
- एक creator का successful result आपके project में वही result आने की guarantee नहीं है।
27. Official resources
- Claude Code: Getting Started - installation और शुरुआती setup।
- Claude Code: CLI Usage - terminal commands और options।
- Anthropic: MCP Documentation - MCP की जानकारी और integrations।
- Adobe Premiere: Text-Based Editing - transcript आधारित editing का official overview।
- Blackmagic Design: DaVinci Resolve - software और official product information।
निष्कर्ष
Claude Code के साथ AI-assisted video editing शुरू करने का सबसे अच्छा तरीका है कि आप छोटे project से शुरुआत करें, files व्यवस्थित रखें, instructions साफ लिखें और पहले audit तथा edit plan बनवाएं। इसके बाद ही supported tools के जरिए actual editing की कोशिश करें।
सबसे महत्वपूर्ण नियम याद रखें: AI का दावा नहीं, project और output का evidence देखें। यदि AI कहता है कि cuts, captions या export पूरा हो गया है, तो timeline, file या rendered video में उसे verify करें। जहां automation उपलब्ध नहीं है, वहां AI से एक स्पष्ट edit decision list या manual steps बनवाना भी उपयोगी है।
पहले एक छोटी sample clip पर भरोसेमंद workflow बनाएं। जब results लगातार सही आने लगें, तभी इसे लंबे YouTube videos, Shorts या client projects तक बढ़ाएं। इससे समय बचाने की संभावना बढ़ती है और गलत edits, data loss तथा अनावश्यक खर्च का जोखिम कम होता है।